See My Work with Patty Lakinsmith for the ISGB/Bead and Button Convergence Exhibit


Sunday, April 8, 2012

FEST Boot Camp Week 4! Quick Ways to Update Your Pictures!

Happy Easter everyone! Seems like we were just celebrating Christmas and the New Year…and here it is – the middle of April already. Boot Camp week 4!!!


By now you should have looked at your listings in detail with an eye toward improving descriptions, tags, your search engine relevance, sections and titles. Whew! Sounds like a lot! If you’ve made some changes, how are your stats? Are you noticing any increase in views?

All of these changes are important, and if you get the potential customer to your shop via the search process, what’s next? The picture of your product! You need to catch the eye of the buyer, make them interested enough to click on it and actually read the nice description you gave. So let’s get started….

First, and the easiest thing to do, is to change up your photos. No, you don’t have to go take all new pictures! When a customer visits your shop, do they see the same products and pictures day after day? Maybe your pictures are all starting to look alike. Boring! Even if you haven’t added new products, a new view of the old ones will freshen up your shop. Take a look at your pictures of one product. You should have used up all 5 slots for different views. Pick one that shows your product differently than the one you are currently using and make the change. See? It looks like you just listed something new. Speaking of different views….a few things to keep in mind: have you shown the product from the front, side, and back? Can you show a picture of how it can be used or worn or displayed? If you offer different colors, do you have a picture showing the choices? Be sure to use all five photo slots! If you have difficulty finding five photos, add one of your packaging.


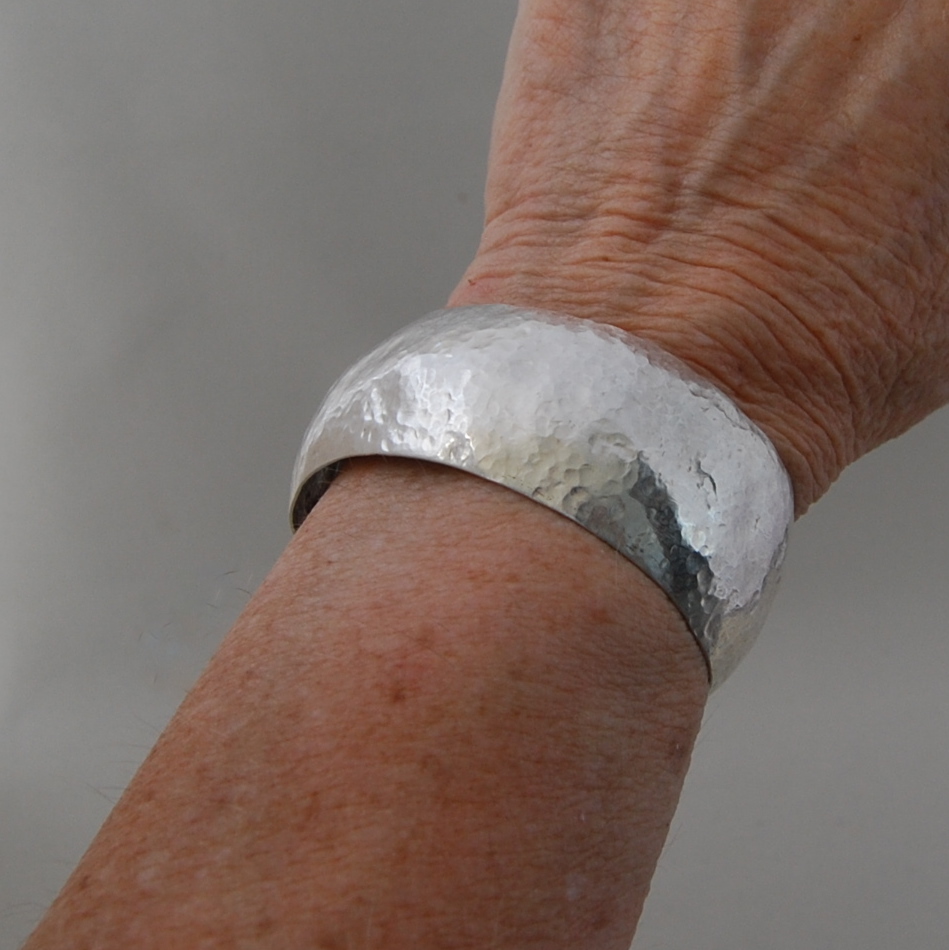
Remember, your customers can’t pick up your product and turn it over, try it on, or feel the texture. If you’re taking new pics (we’ll talk about that later..) or even if you use an old one, crop it close so they can see the texture or design. Don’t worry about showing the whole product…what you’re looking for is the texture. Here’s an example:


Next, let’s talk about visibility. Are your pictures light and bright or dark and difficult to see? Short of taking new pics (like I said, that’s for later) there is a quick and easy solution. …..use your photo editing program! Since I don’t know which one you use, I can’t address specifics. However, every program has a light and contrast feature. Pick a picture and, using your editing program, see if you can make it lighter. The lighter the better, short of making the product disappear! Try the contrast feature to darken up some of the detail against the lighter background. Does it make the product pop a little? It should. And my favorite is the sharpen feature. When you’ve adjusted the photo and made it lighter with contrast, hit the sharpen button and see what happens. In most cases, the photo will appear crisper. One caveat: make sure the colors are as accurate as you can.

 Before

After


Another trick to refreshing your old photos is to recrop them. Maybe the product looks small. Or maybe it’s off center or in a clutter. Crop away some of the clutter, or use this action to center it. You’ll see a big difference in your old photos by using some of these simple techniques. Here’s another example:



So ok – let’s review!

Step 1: Look at your photos! Do they show your item accurately and in detail?

Step 2: Change them up! Move a new view into the first position. It will look like you added something new.

Step 3: Be sure you’ve used all five slots. Add your packaging in one if you’re having difficulty finding five photos. Make sure you show all sides, front and back. Or how it can be used/worn/displayed.

Step 4: Crop to show texture.

Step 5: Lighten up where you can! Don’t forget the sharpen feature!

Step 6: Recrop an old photo. Sometimes all it takes is a little tweaking to make the product more visible and interesting to the buyer.

Step back and look at your shop as a whole. Do the photos give the customer a reason to keep on looking? By now you will have played with them enough to know if taking new shots is what you need to do. Next week we’ll talk about that in detail, but for now, try the exercises I’ve listed and see what you think. Your shop should look different than it did when you started and that’s probably a good thing. I play with my photos all the time! I still need to do some of these steps and I’ll be doing them right along with you this week. 

So have fun and be creative!
Toodles,

Sunday, April 1, 2012

Get Found By The Search Engine - FEST Bootcamp Week 3

Well, we’re almost to the midpoint of our FEST boot camp exercises! Welcome to week 3! How do you think you’re doing so far?


I know that for some of you, last week might have been a major task. We looked at our tags, added “mother’s day” tags, or “gift for mom” or whatever else was appropriate. For some, with around 100 listings, I’m sure that took a lot of time. I hope you looked at the Etsy Apps to find one that would do it all at once for you. Believe me, those Apps can be time savers.

This week we’re going to look at your listings and see what we can do to get them found in Etsy and Google searches. Again, this will involve tags, as well as titles and your descriptions.

Let’s talk about Google first, because it’s really important to find buyers off Etsy….a way of bringing in new customers. What I’ve learned – and I still need to make changes like you – from my research on the subject is that Google likes repetition. So first look at your product. What is it? I’ll give you an example: Copper cuff. I can give it a fancy name like “dream cuff” but how many people do you think will type that name into a Google search? Right! Probably only me, so Copper Cuff needs to be in the title. Next, look at your description. Your first sentence needs to include the words Copper Cuff. This will make your product Google relevant. These changes will also apply to your Etsy search, but you need to include these keywords in your tags as well, in order to be Etsy relevant. If you’ve read any of the blogs from Etsy marketing, you know the search process is all about being relevant.

While you’re looking at your descriptions, ask yourself – does it tell a story? Or is it creative? Does it make the potential customer interested in seeing more? Yeah, I can hear you groaning! I hate writing descriptions too! Most of the time I’m in a rush to get the product listed, and my creative writing just isn’t there for me. So, like you, I’m going to take a look at my descriptions and see if I can improve them. Things like how it was made, or why it was made, or imaginative uses for the product are simple ways to enhance your descriptions. Phrases like “a perfect gift for Mom” can apply this time, since increasing sales for Mother’s Day is our goal.

Another thing I recently learned: Your shop sections tell Google and potential customers what your shop is all about. Check out your sections. It’s easy to get carried away with cute descriptive titles, but Google won’t know what you’re talking about. Maybe your customers won’t either! So try to include your key words in your shop sections too. Example: “Copper Cuffs” if you have more than one. Or something even more basic – “Metal Cuffs” or “Copper, Brass and Silver Cuffs”

One last thing about key words: if you go to your shop stats section, below the nifty graft of activity, you’ll find a list of key words customers have used to find you. That will give you a good idea of what words are working for you, and which are not. Can you apply those key words to more of your products? If you can, this will increase your visibility in the search process.
Ok – so let’s recap!

Step 1: Look at your titles. Do they accurately describe your product?

Step 2: Look at your descriptions. Have you incorporated your title into the first sentence? You can get pretty creative here!

Step 3: Look at your tags. Have you included the keywords?

Step 4: Look at your shop sections. Make sure they accurately describe the products to be found in your shop.

Remember: Repetition, Repetition, repetition!

Before I sign off, here are some Mother's Day gift suggestions - handmade in the USA - by some of our bootcamp participants!


Great cuff by Devine Designs!

Or a beautiful Rosary by beadloverskorner!
Lovely gift basket by Black Willow Soaps

Cute kitchen towel by InYourBones!

Have a great week!
Toodles,

Sunday, March 25, 2012

FEST Boot Camp - Week Two

Well! We’re on to week two!!! I really loved hearing about your goals and hope you feel you’re on track to get there. This week we will focus on specifics for readying your shop for Mother’s Day. With that in mind, let’s take a close look at the products in your shop.


Step 1: Make a list of all the products that you think would make great mother’s day gifts. They can be from hubby, children…or from a new grandma to a new mother! Lots of possibilities! Be sure to look at your sold items…is there something there you sold that you haven’t replaced in your shop or that you could make again that would make a good gift for Mom?

Step 2: Look at your price range. You should have a variety of prices. Make a list:

Under $25 _____ Under $50 _____ Under $75_______ Under $100_______
Noteworthy or Luxury_____. Are you short on any category? Now is the time to plan to make products that fill that price slot. What products will you make?

Step 3:  Look at the products you identified in step one, then look at the tags you used for those items.
If you completed the first two steps, step 3 will be a cinch.  Have you included “Mother’s Day gift”, Gift for Mom, gift for a new mom….or any variation in your tags? If you completed step 2, you guessed it…you can use your price list to adjust your tags as well. “Under $25” will help someone with a limited budget find your item in a search, and so on. Start revising your tags now so they can be found in mother’s day searches and for treasuries of the same theme. A little at a time will make it seem not quite so daunting.

And that’s it! It’s enough to keep you going all week. To make the changes in tagging easier, check out some of the apps Etsy has featured in the apps section. There are a couple that will change tags automatically by adding or deleting whatever you tell it to. Some of them are great time savers!

Before I sign off, I wanted to feature a few of our team mates…I specifically chose items I think would make great gifts for mom.

Who wouldn't want a hug from PennyBoperoo??

How 'bout a gorgeous ring from RecreationalArt?

Fab earrings from MadScientist are a great idea for Mom!

Beautiful Bead bracelet from Beadloverskorner!

You can't go wrong with any of these choices! They're all unique in their own way!
So that's all for now!
Toodles,


Tuesday, March 20, 2012

My Try at Lampworking - Again!

OK, so I've mentioned before how interested I am in lampworking. It's not so much the creation of the beads as it is the properties of the glass. What happens to it when a HOT torch hits it interests me to no end. That's how I started in metal, and it's been a never ending exploration. So...off to class I went once more.
I'm priviledged to live near a great teacher and artist, Joyce Horn, who's skilled at so many things, I dare not try to list. Her forte is beadmaking and stained glass beauties, so I went to her once more. It's not that I see myself creating a ton of beads and I admit, after my last class with Joyce, I never even picked up the torch to apply it to a glass rod. Not for lack of enthusiasm, but for lack of time to venture off the metal path into something new. No practice, no results!
Joyce opened her studio (and her gimongous heart) to me and Jill Bradley last week and we sure had fun. One of the things I find different from other lampwork artists is Joyce's incorporation of dichroic glass into the bead. I'm sure others do it, but in my limited exposure to watching glass beaders work, I'd never seen it done before and I really like the results.
Jill and I sat for a couple of hours, after Joyce's demonstration, and attempted to make beads. Now when I say attempted, I'm referring to me. Jill, on the other hand, cranked those babies out at rapid fire speed! Don't you just hate it when someone you know - with major talent in many artistic modes, I might add - takes to something you're trying to learn like a duck to water???? Geez! And hers actually looked like beads. (I will refrain from describing mine!)
After I get mine cleaned up, I'll (maybe, I think, well we'll see) post a pic or two. I will expect a lot of sympathy, though!
In the mean time, here's a couple of fab beads made by Joyce. She sells them on Ebay under Joyous Creations, Inc. if you want to see more.


Beautiful!
Well, that's my latest news....
Toodles,

Sunday, March 18, 2012

FEST Boot Camp is On!

Woo Hoo! Today is the day! If you signed up for the Florida Etsy Street Team Boot Camp, you’ve been waiting for this! I know I have and I’m rarin’ to get started!


This is YOUR boot camp! Do as little or as much as you think you can or have time for. The more you do, the better prepared you will be for Mother’s Day – our ultimate goal.


Though I originally thought I’d take the easy way and follow Etsy’s Holiday Boot Camp steps, I’ve decided that we’re all too busy for long lists of “to do’s” so you’re getting my version. Feel free to chime in here with suggestions….I’m very open to ideas other than my own!

So, let's get started!

Step 1: Clearly define your goals. What do you want to accomplish? Write it down and share it with us, if you want. Here’s mine: I have always wanted to have a mailing list so I could send out news of specials for the holidays. I need to make a plan to do this. But I’d like to have a list started by Mother’s Day. So when you define your goal, think about what it’s going to take to accomplish it. Maybe you have a financial goal, or a sales number in mind. Maybe you want to improve your photography. If you share your goal with the rest of us, we might have some suggestions on how to get there!

Step 2: Make a budget for time and money. This doesn’t have to be complicated. Think of renewing and relisting as well as new listings. It will help you if you set up a plan that includes how much you want to spend each week for these things, and how much time you want to spend doing it. You may want to take advantage of Etsy’s ad program or use google ad words or Facebook Ads. All are viable options, and if you want to get noticed, you need to get customers from outside Etsy. There are plenty of free ones – like using your social networking (twitter, facebook, flickr, etc). Here’s how I’m doing it: I allow $30 a month on advertising. That’s all, no more. If I break that down, it’s $5.00 a week. It’ll come back to me with one sale, so it’s worth it. I plan to spend one hour a day listing a new item or renewing, then on to twitter and facebook to post something. One hour per day on line is enough for me. I can get carried away and spend several hours on the computer which means less time in the studio. Fun but not good! I want lots of new items to list for Mother’s Day, so I need to work! This plan may not work for you, it’s just an example to get you started. Your financial goals should include how much you want to make in a defined period. Example: $250 a week for the two weeks prior to Mother’s Day. What will it take to make that? More listings? More exposure? Think about it.

If you complete these two tasks this week, you’ll be off to a good start. Next week we’ll expand on the plan. Last time FEST did this boot camp, you were to pick a buddy. It’s not required, but if you can find a buddy to work with, I highly recommend it. It’s nice to have someone as a sounding board, but that’s just one more option to help you work your plan. If you have any questions, feel free to contact me. Most important: have fun!

Toodles,

Monday, March 12, 2012

FEST Boot Camp

Well, for those of you with Etsy Shops, you know that Mother's Day is a big day. Sales and views leading up to it are usually very good. However, we on the Florida Etsy Street Team are going to do what we can to increase our visibility by implementing Boot Camp.

Etsy introduced their Holiday Boot Camp last year, so we're adopting and adapting! Each week the tasks will be posted here along with any forms necessary. If you're not a member of FEST, that's ok! I invite you to participate anyway! If  you're from Florida, with an Etsy shop, you can join FEST by going to: http://www.etsy.com/teams/5263/florida-etsy-street-team and signing up. If you're already a member of FEST, you can sign up for the boot camp here: http://www.etsy.com/teams/10586/festive-bootcamp. Come one, come all!

Boot camp will start on March  19th. I will also be featuring a member each week, talking about how they accomplished the tasks at hand, along with some of his/her yummy designs from their shop.
So stay tuned!

Toodles,

Tuesday, February 7, 2012

The Oops Opportunity (or how to turn your mistakes into something unique)

The other day, while showing off one of my finished pieces to my husband, he said "I just don't know how you have the patience to do this. I would make so many mistakes!"

Mistakes???? Moi???? Ha ha ha! Of course I make mistakes - plenty of them, in fact. You name it - burn it, melt it, break it, I've done it all!  But it brings to mind something one of my instructors, often said to our class, "Turn your mistakes into a creative opportunity!" OK, sometimes it's just gone....but many times it does present itself as a ceative opportunity. I've had a lot of fun figuring out what to do with that burned hole in the middle of my cuff....or the wire embellishment that wasn't meant to be melted in half.

For those of us who create - opportunities often present themselves in strange ways. But we wouldn't continue to try if we didn't really love what we do....we'd just give up everytime we made a mistake and that would be sad.

Here's an example of a mistake that gave me pause. While trying to use the torch to get an organic appearing texture, I applied too much heat in one spot and burned a hole right through it. What to do, I thought????  Well, after putting it aside for a few days, I went back to it with a new perspective...and here's what happened.

I definitely had the texture I was going for, so I added the hammered copper wires, protruding from the hole and oxidized it to bring out that molten lava look and aptly named it "Eruption".  I liked the way it turned out and put it in my Etsy shop - and it sold right away.  Obviously I will not be able to recreate it, but it's a good example of using an Oops opportunity!

So don't give up when you make a mistake....put it aside and go back to it later. You'll be surprised at what you might think of!

Happy creating...
Toodles

Have you pledged yet?

I Took The Handmade Pledge! BuyHandmade.org